> For the complete documentation index, see [llms.txt](https://insignia-1.gitbook.io/unofficial-guide/llms.txt). Markdown versions of documentation pages are available by appending `.md` to page URLs; this page is available as [Markdown](https://insignia-1.gitbook.io/unofficial-guide/custom-dashboard-support/pihole-dns-configuration.md).
# PiHole DNS Configuration
{% hint style="warning" %}
**Note:** This guide assumes you have a basic understanding of networking, and that you already utilise PiHole.
{% endhint %}
## Overview
DNS is a fundamental element of how the internet works and is basically how computers find each other. The original XBOX Live system has a few "baked-in" DNS records that need to be re-directed to the Insignia servers in order for your XBOX to work with the Insignia service.
This is typically done by using the Insignia DNS servers. An alternate method is to utilise PiHole on your network.
## Guide
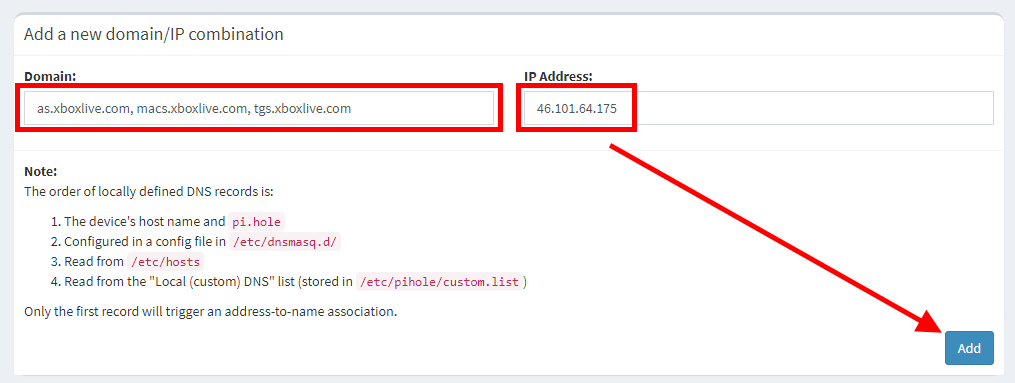
1\. Access the PiHole Admin Panel and Navigate to Local DNS > DNS Records.
[](https://user-images.githubusercontent.com/4142046/208539253-4a172d97-21a1-445a-88c4-3610b387733f.png)
2\. Add the following three domains, and set them to target the IP Address **46.101.64.175**.
* as.xboxlive.com
* macs.xboxlive.com
* tgs.xboxlive.com
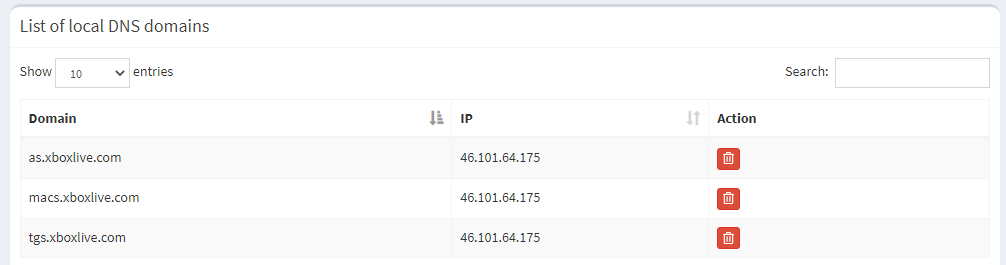
3\. When the screen refreshes you should have three new DNS entries.
If your network is configured to use PiHole for DNS, your Xbox Console should connect to the Insignia service automatically after a restart or reboot.
Alternately, you can configure your Xbox Console to use your PiHole as it's primary DNS server.
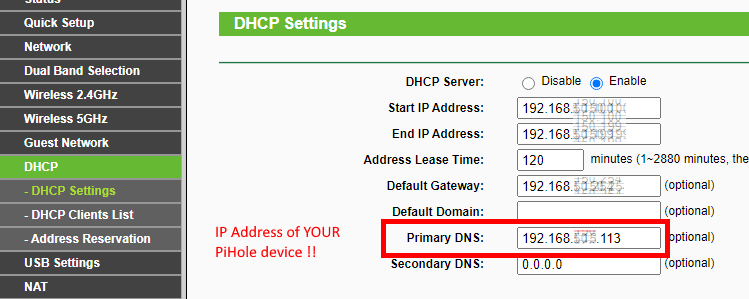
## Router Configuration
Your Router should already be configured to use your PiHole as part of the PiHole setup, which is beyond the scope of this document. Here is an example configuration. ***Your settings will be different!***